
Summer is well on its way and the first signs of Back to School season are starting to make themselves noticed. So what does this girl do? Well, she starts dreaming of next year’s classroom and all the possibilities 🙂
As a long term supply teacher, I have no idea (yet) what assignment I will get next year. And when I mean no idea, I mean not a clue about grade, school, classroom layout, etc. There even is a chance that I might have to do short term supply for a while before I get a bigger assignment. However, I decided to spend my time “DIYing” some classroom items that might come in handy someday (and in any set up).
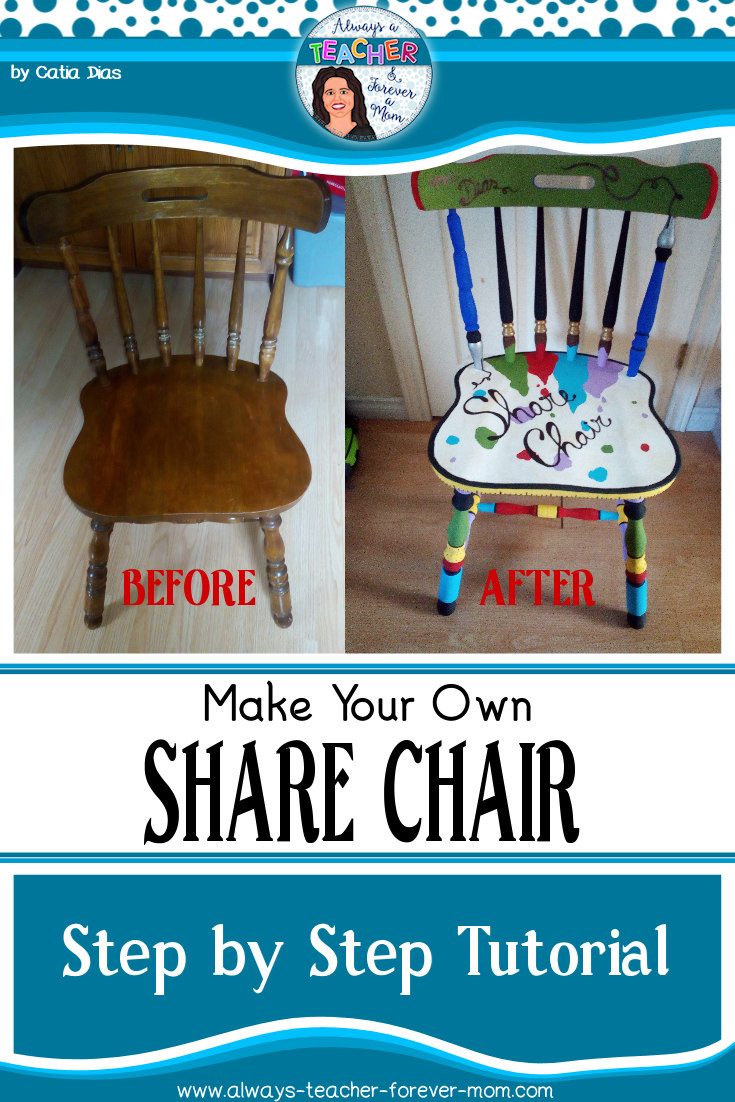
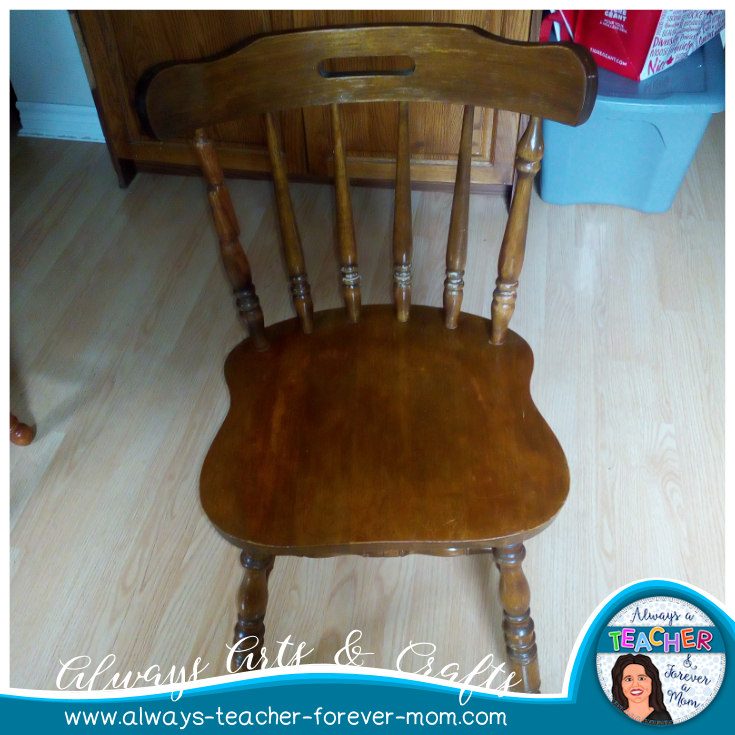
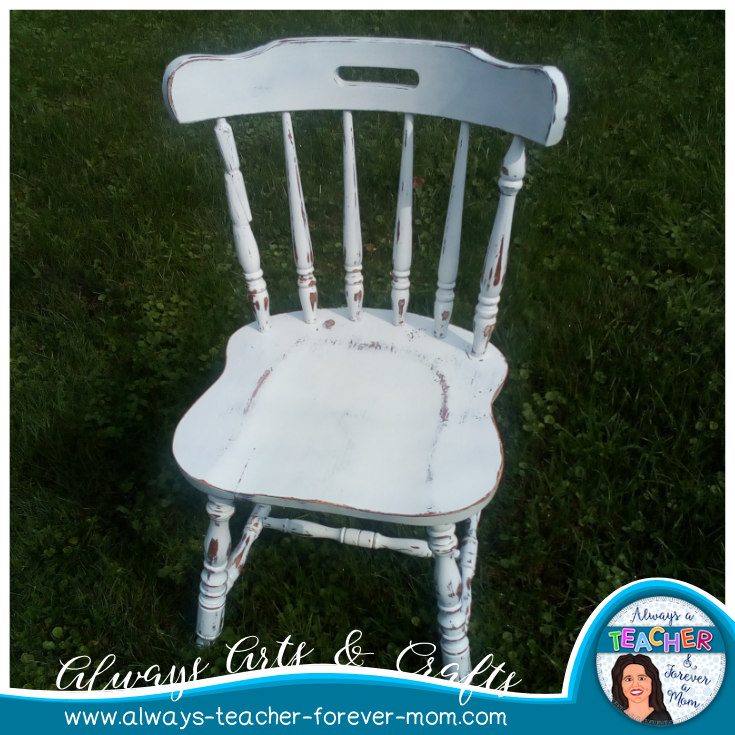
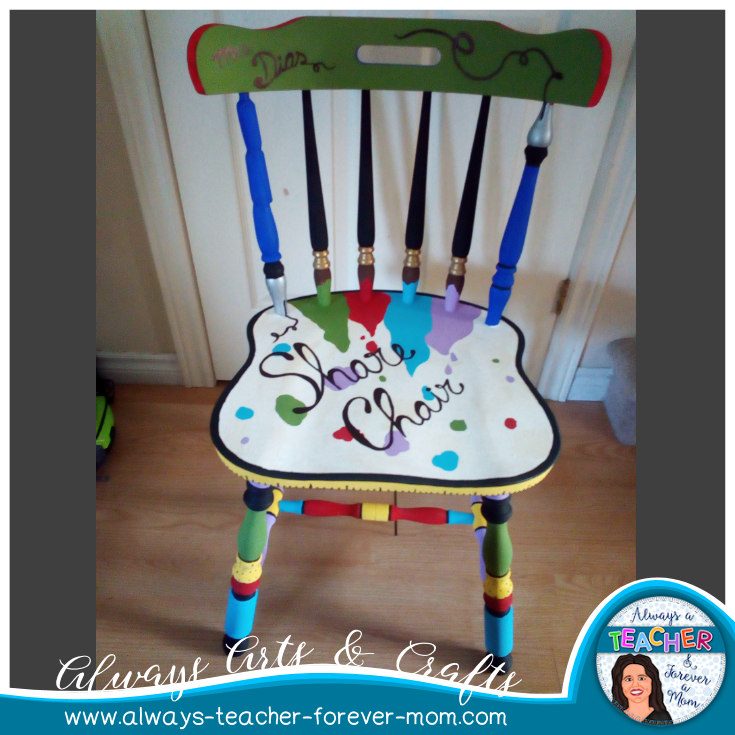
My first item is a “share chair” or “author’s chair“. Destined to be THE chair for kids that want to share their work or interesting things, it has been in my to-do list for quite some time. While reorganizing my basement this summer, I found an old lonely chair that was just taking up space. It has been mended in one of its back’s rods, but it looked like it could be transformed into something cute, so to work I went.
What you need:
- 1 old wooden chair
- sandpaper
- electric sander (optional)
- paint brushes (different sizes)
- 1 can of spray primer
- acrylic paints
- time (about a week or so 😉 )

Find your chair, wash it and let it dry completely.

Sand all the surfaces of the chair. You want to make sure that all the shiny parts are gone. This is when an electric sander comes in handy. If you have it, use it! I felt so silly when hubby reminded me that we actually own two sanders – after I had finished the first sanding by hand…
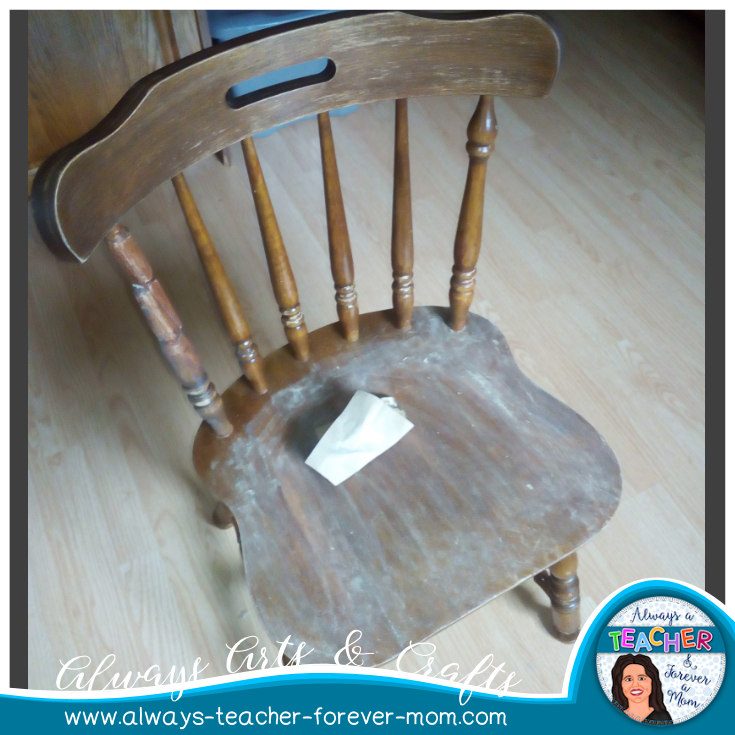


Wash the chair with soapy water to remove all dust from the sanding. Let it dry thoroughly.

Grab your can of spray primer and prime the entire chair. Make sure you do it outside and that you protect all surfaces that you don’t want ruined. I actually did on the backyard lawn (which needed to be cut anyway). Let the primer dry for as long as you can manage waiting.
The primer I used dries in minutes, but I decided to only start painting the next day. I was NOT going to risk any chances of having my work ruined because the primer wasn’t dry enough, lol.
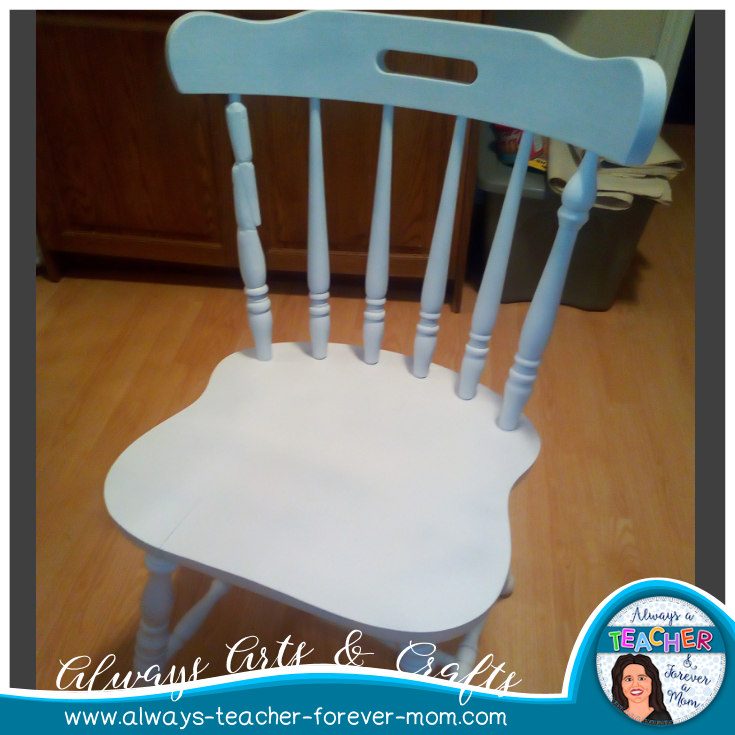

Once the primer is dry, sand it lightly so that you are able to paint on a smooth surface. You don’t really need to do this (according to the instructions on the can), but hubby suggested I do it anyway. And since he is son to a former carpenter…
Wash the chair again and let it dry thoroughly.


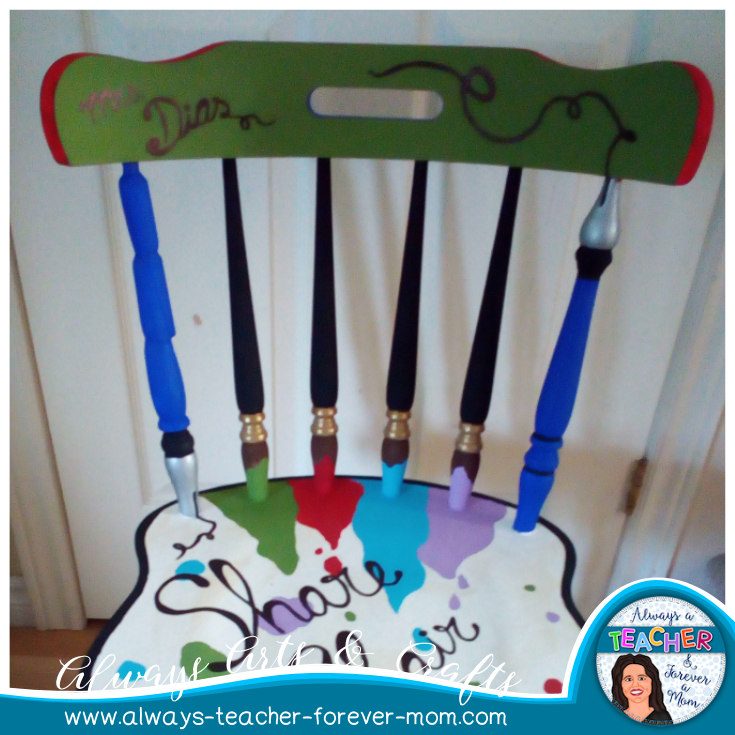
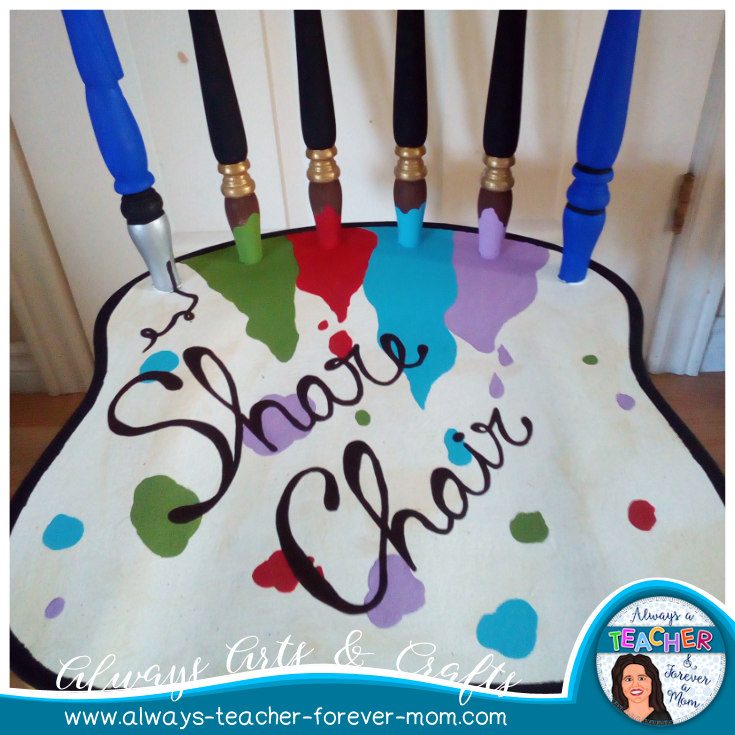
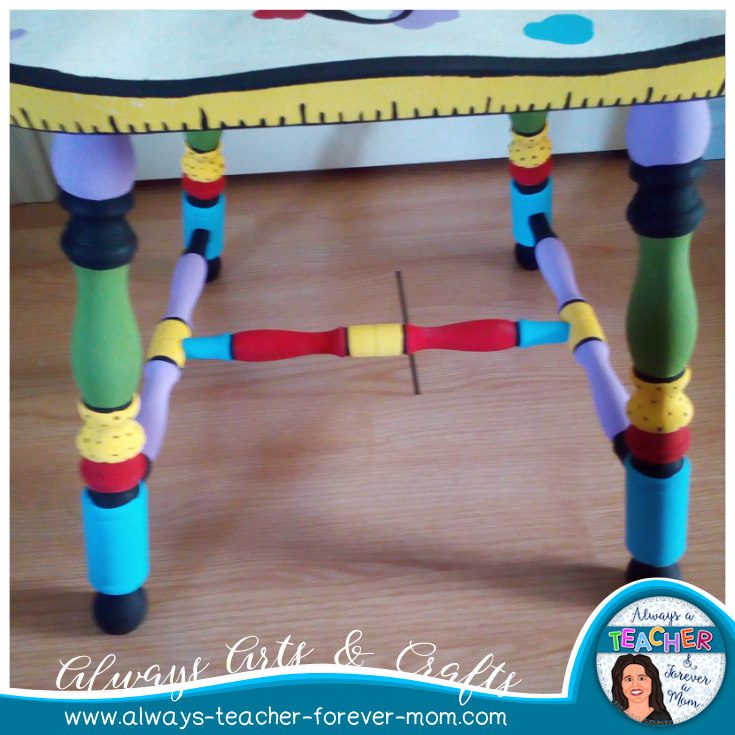
Now that the prep work is done, it’s time to have fun. I didn’t photograph the step by step of the actual painting but here is the final product. I tried to play with the shapes of the chair. I am quite pleased with it. What do you think? Leave your opinion in the comments below 🙂
NOTES:
- Since I used craft acrylic paints, the finish is matte. I might use an acrylic clear coat to give it a little shine and further protection but for now I am leaving it as is.
- I noticed that some colours didn’t cover as well as others. Yellow and red needed at least four coats of paint until there was a solid colour. Black, green, purple and blue only needed a couple of coats.
I hope you enjoyed this tutorial. Please make sure to leave comments below. If you end up making a chair of your own, please leave a link below so that I can admire it 🙂
Take care,
Catia
