
Yesterday we experienced the first snowfall of this year. It was hard to look through the window in the morning and see the ground covered in white. It is a lovely sight, but when you live in a climate where snow is an everyday thing in the winter, you tend to dread it 🙂
Anyway, snow reminded me that the holiday season is about to get here, so I started to brainstorm a few easy arts and crafts projects that you could try with your students.
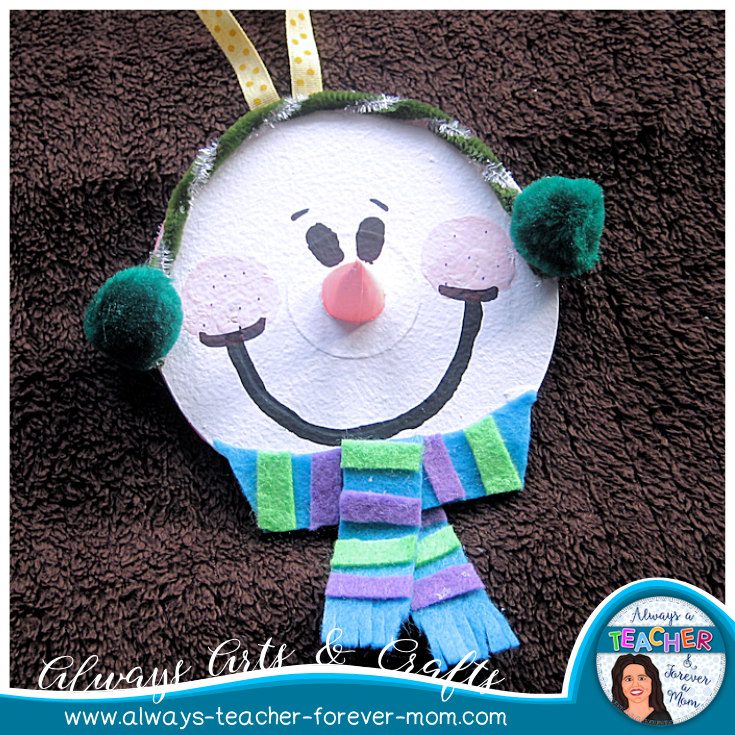
The first idea is made with old CDs or DVDs. These ornaments are easy, inexpensive, durable, and can make really cute keepsakes. I will be posting several different tutorials, so stay tuned!
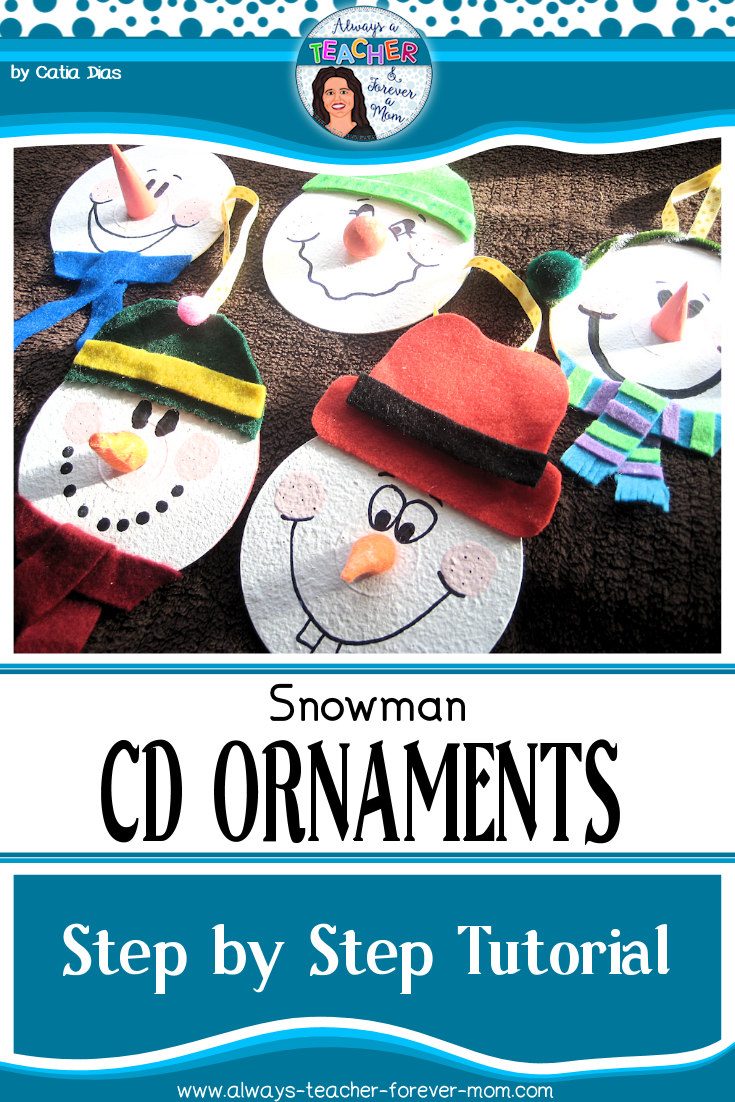
The Snowman Ornament
What you need:
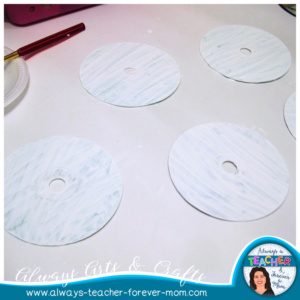
- old CDs or DVDs
- acrylic paints (white, black and orange)
- card stock paper
- scissors
- pipe cleaners
- pompoms
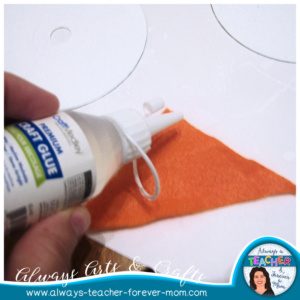
- felt in different colours (orange for sure)
- ribbon
- paint brushes and/or sponges
- wooden bead (if you want to make a different type of nose)

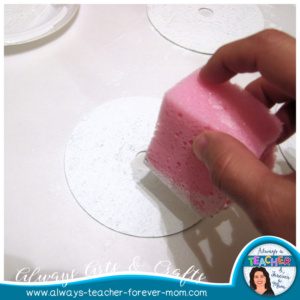
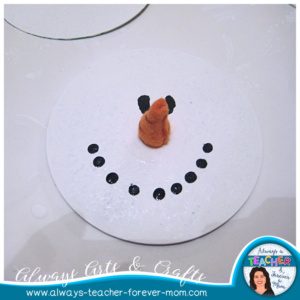
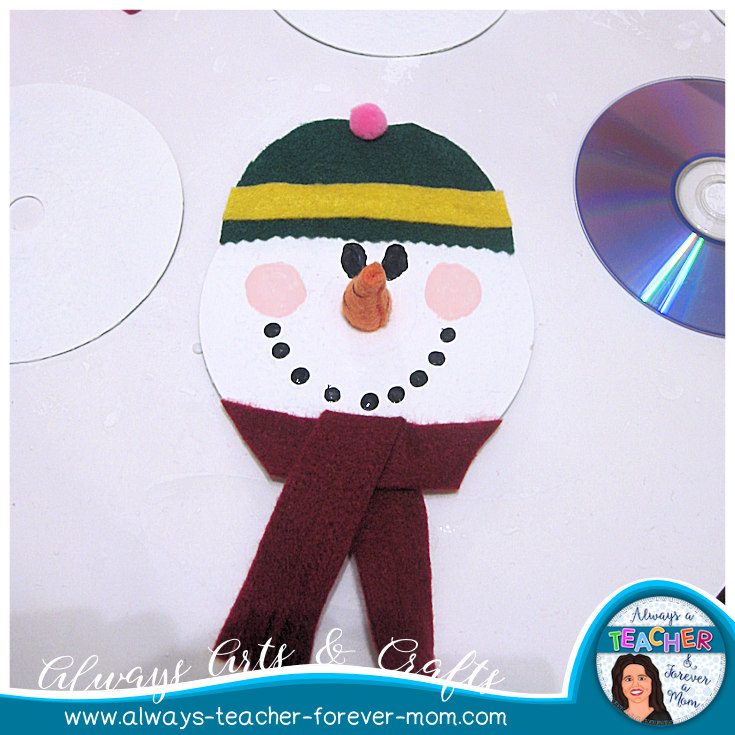
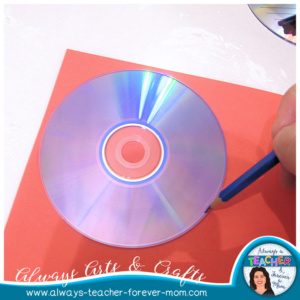
Carefully paint the disc with white acrylic paint. I started with a paint brush, and then gave it a second and third coat with a sponge. The sponge gave the discs a cute bubbly effect 🙂


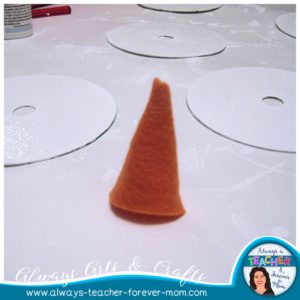
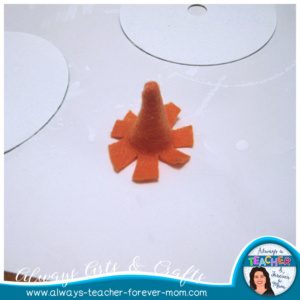
Make a cone out of an orange piece of felt or card stock. Make small cuts all around the base of the cone.


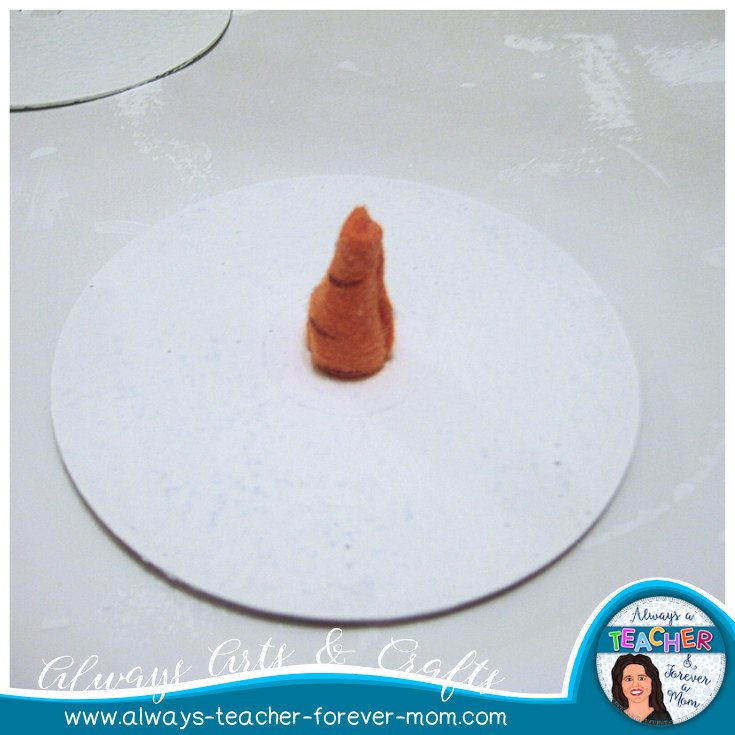
Insert the cone through the hole in the middle of the disc, making sure that it sticks out toward the paint side of the disc.

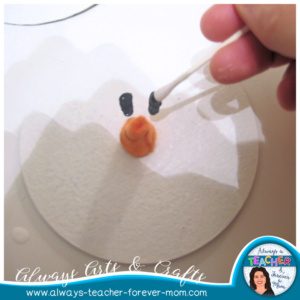
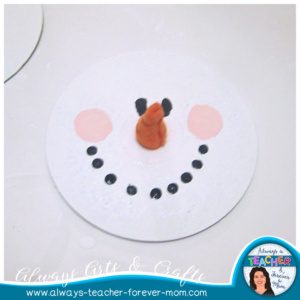
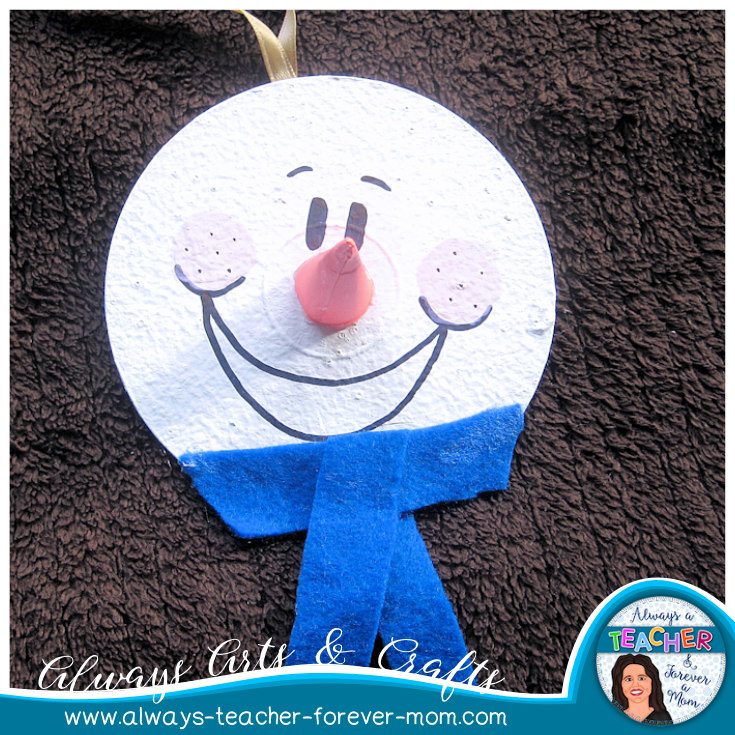
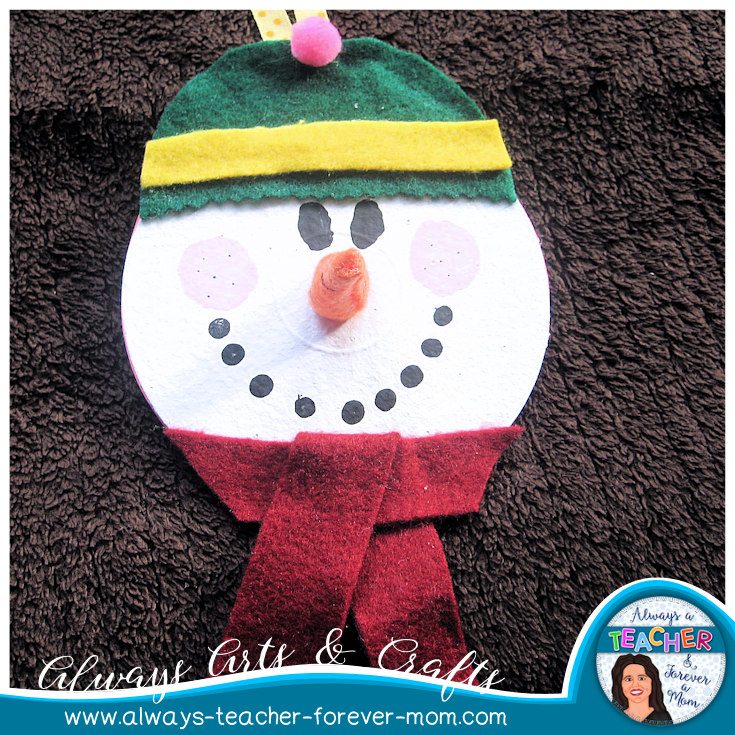
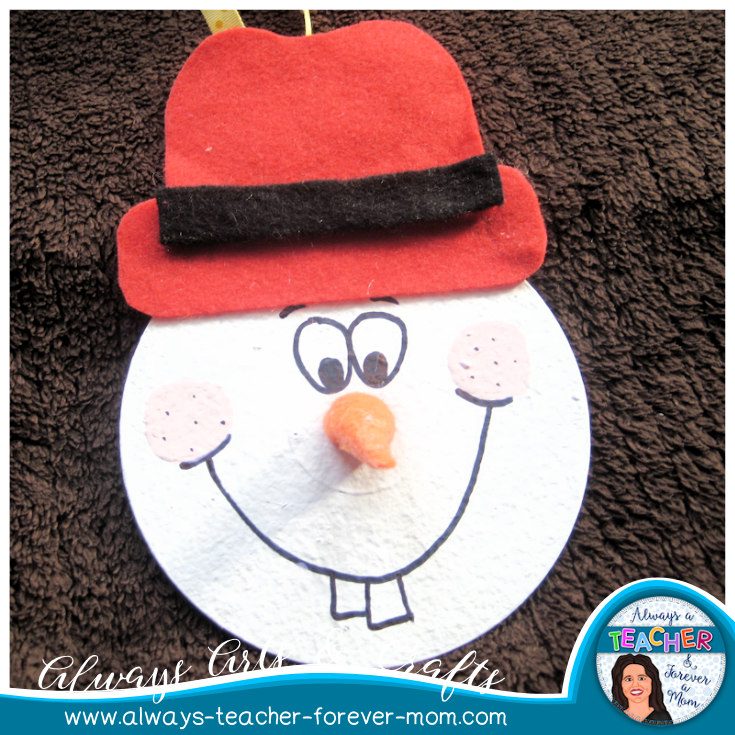
With cotton swabs or a black permanent marker, add the eyes and mouth to your snowman. The eyes should be placed close together and above the hole at the center. The mouth should be painted underneath the hole.
You can also add some blush to the cheeks if you want 🙂
[supsystic-slider id=13 position=”center”]

Flatten the pieces of the felt nose, and attach them to the back of the disc with hot glue.
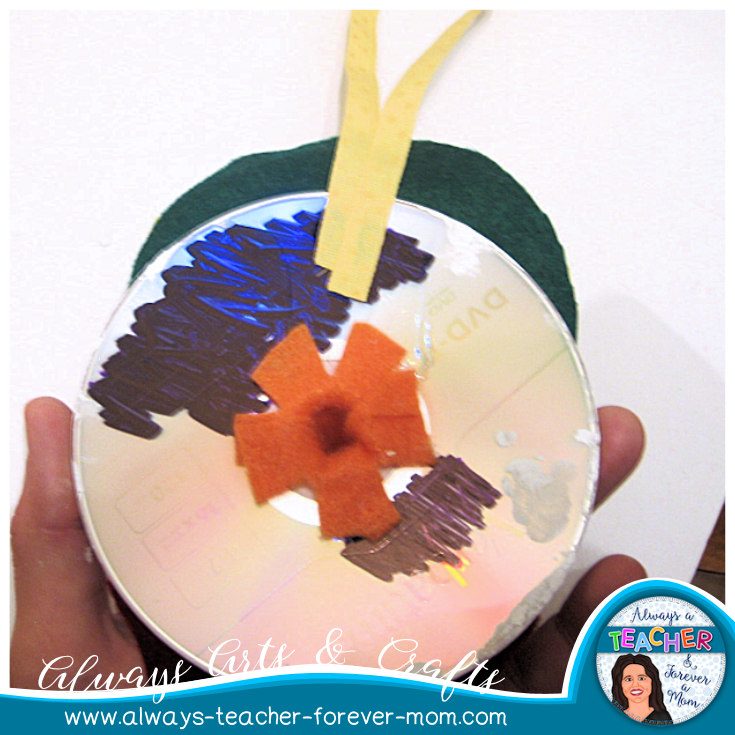

Use different pieces of felt to add a scarf and hat. You can also use pipe cleaners and pompoms to make earmuffs.

Cut a piece of card stock or construction paper to fit the back of the disc. Trim it and add your student’s information to the back. I usually add name, grade level, and school year. You could also add season greetings 🙂
Cut a piece of ribbon and fold it in half. Glue the ends of the ribbon to the back of the CD (make sure you are gluing it at the top otherwise your ornament will be upside down when you hang it).
Glue the card stock to the back of the CD, making sure the information is on the outside.


Here are some variations that you might use as a reference:

I hope you enjoyed this post. Please stay tuned as I will be posting more tutorials for CD ornaments! 🙂
Click HERE for the tutorial for the Reindeer CD Ornaments.
Thank you for reading and please feel free to leave comments below.
Take care,
